Just talkin about games on WordPress.com

Latest

Lexan or plexiglass

So you are making the ultimate arcade machine and you have some sweet artwork planned for your control panel and you want to protect it. I mean, some friend of your kid could be hanging out, in your garage, and spill his Coke all over your precious control panel, are you going to freak? Nope. Are you going to come at him, bro? Not even. You will be as cool as a cucumber. Why? Because you thought ahead and protected your artwork, you smart person, you. But if you still wanted to you could ban that kid for life because he has no Coke control, and nobody would blame you. You can’t afford to build another ultimate arcade machine from scratch and you certainly don’t want butterfingers with the Coke holding problem still lurking around. He probably picks his nose, too.

Anyways, the debate between Lexan vs. Plexiglass is an oldie but a goodie. Plexiglass is cheap, and by “cheap” I mean both an inferior product to Lexan and less expensive (one 48″ x 36″ sheet was about $30). Plexiglass is more brittle but it is still tough and can serve your purpose and save you money. Lexan costs more than twice as much (one 48″ x 36″ sheet was about $80) but it will not crack. For me, as you know, I’m on a very tight budget so every dollar counts but the thought of cracking the overlay was a huge factor.

I’ve heard some horror stories where someone is drilling out the button holes on their Plexiglass overlay only to make it to the last one and have it crack, splintering the overlay rendering it useless. Typically this problem occurs to those who are drilling 12 to 16 holes on their overlay. I will be drilling 50 holes. Some people online swore by plexi saying if you go slow enough there isn’t any real threat of ruining the plexi. Still, with my wood working skills, I cautioned on the side of potential error.

Lexan, I darn near killed 'em!

I hear Lexan control panel covers are all the rage now with the high school kids.

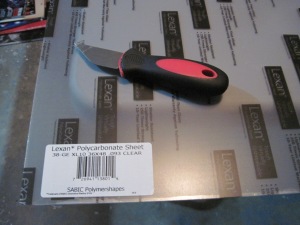
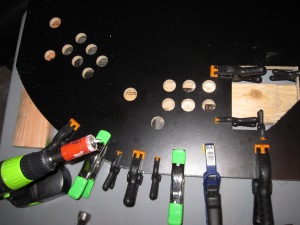
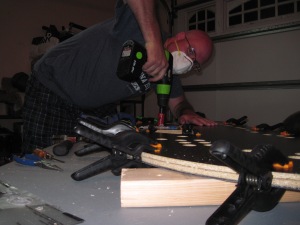
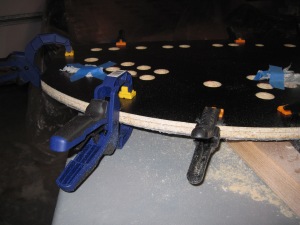
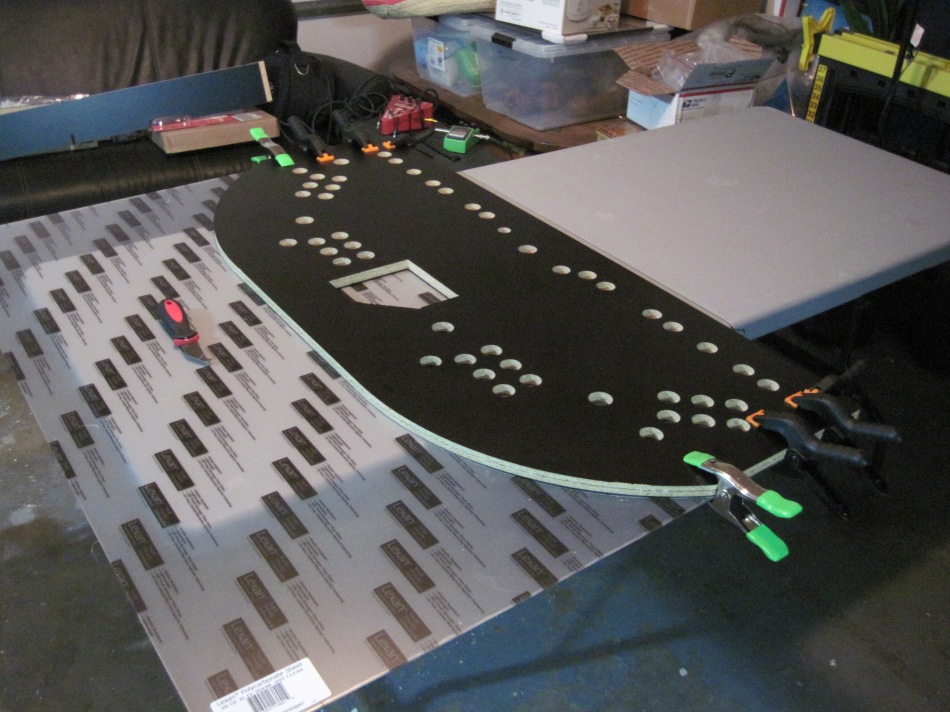
I clamped the Lexan sheet to the bottom of my CP top board, with the pre-drilled holes, and as carefully as I could I began drilling. I clamped it on the bottom so I could use the pre-drilled holes as guides automatically lining up perfect corresponding holes on my overlay. I had also picked up a hole saw drill bit for my simple cordless drill, and a Lexan scoring knife. I wasn’t too worried about scratching up the surface of my CP with the hole saw since I was going to cover it with artwork and a Lexan panel protector.

Here is how it was going to go down: First, I was going to score the Lexan so it would be in the general shape of the CP. Second, cut out the oddly-shaped trackball area. Third, clamp it up and drill away those pesky, unwanted holes. Fourth, sand down the rough edges as needed.

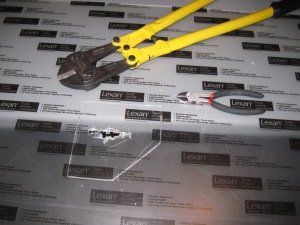
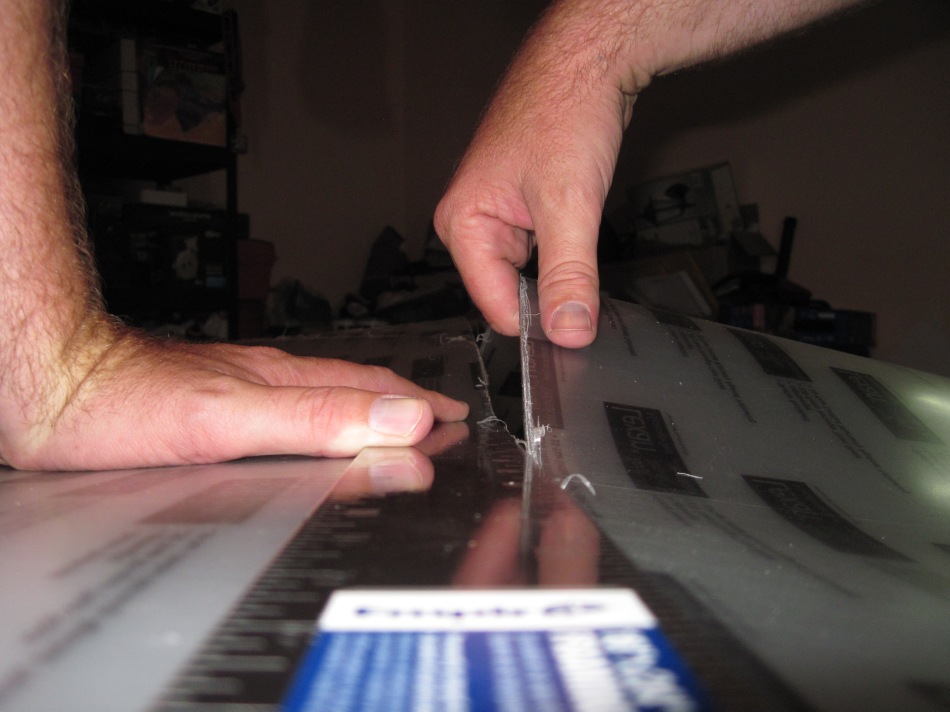
The scoring knife did not work as advertised and I would like my $2.55 back. I scored the crap out of that Lexan but due to its tough durability I could not just “score it and snap it off” as was casually described to me by the Lexan scoring knife packaging. So I thought I would take a different approach and try cutting along the main line. FYI, I don’t have any scissors or cutters of any kind that can cut Lexan. Nothing was big enough. Nothing that is, except for… my BOLT CUTTERS!!!

The only scoring going on was not done by this device, I can tell you.

It stinks!

These things have paid for themselves.

Bolt cutters are freaking awesome!

Score and bend. Bend and score.

He scores!

They look like big strong hands...

It won’t crack or scratch easily but you can tear it.

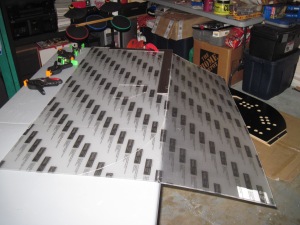
So I started the cut with the bolt cutters and ended up ripping it along the scored line with the help of a t-square just to make sure it didn’t rip anything it shouldn’t have. Total success. The odd-shaped trackball hole was a bit harder since I couldn’t really get a good enough grip to tear until I had cut enough of it away. I couldn’t fit my bolt cutters into the hole. I was so desperate I even got out my sawzall and tried to make a pass. Luckily I didn’t completely destroy my overlay or my leg. Finally, after trying various knives and cutting tools I had a hole big enough where I could grip the inner Lexan piece with my needle-nose pliers and tear along the scored line. Success!

So then it was on to more clamping and drilling.

Yeah, but are all those clamps really necessary? Even the itty-bitty ones?

So you think I should clamp this down using these clamps I have here?

Dude, EYES ON THE DRILL!

Mr. Driller

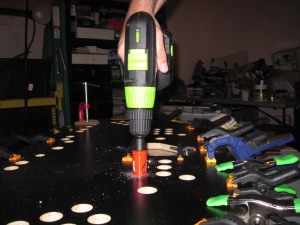
Beautiful holes begin with 90 degrees.

Don’t drill me, bro!

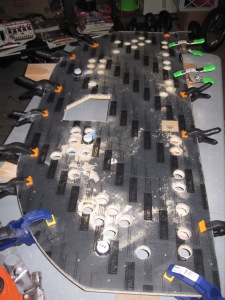
In this first picture you can see I’ve clamped a 2 x 4 under the holes I was going to drill. This made it so as I would push the drill down through the Lexan it wouldn’t pull away from the CP creating a messed up overlay. This also guaranteed a straighter cut through the Lexan, as well.

IMG_0753

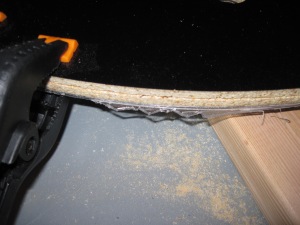
Unsightly jaggies

IMG_0759

Eh, its not so bad. Just try not to look at it.

IMG_0755

Oh no. Not the Dremmel tool! Someone stop him! He’s trying to ruin everything!

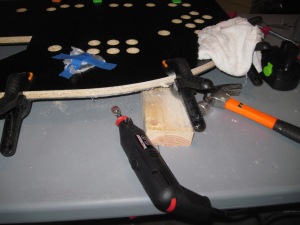
In order to sand the edges down a bit I rashly decided to employ my Dremmel tool. It does sanding, right? Oh yeah, it does. Just a little bit too well. I should have taken the time to sand the edges by hand and I would have had a better finish. Instead I rushed it and used the Dremmel which accidentally left a slight wave pattern to the outside edge of the overlay. I admit, its only really noticeable to myself and everyone who has seen the finished product swears they wouldn’t have seen it but its the first thing I look at. Ugh. Also, if you go too fast the Dremmel doesn’t sand Lexan, it melts it.

Almost there

The semi-finished product

I used several arcade pushbuttons to hold the plexi in place while I was drilling and sanding keeping everything tight and lined up.

$80 well spent

I’ll take it!

Several problems with my personal setup:

1. I have a cheap cordless drill I had to recharge several times through the drilling process. Mental note: get a better drill.

2. A huge bag of cheap clamps does not = 3 or 4 really good clamps. Mental note: get better clamps.

3. If you want a really nicely sanded and visibly neat finished product, do not use a Dremmel tool. Mental note: don’t be stupid.

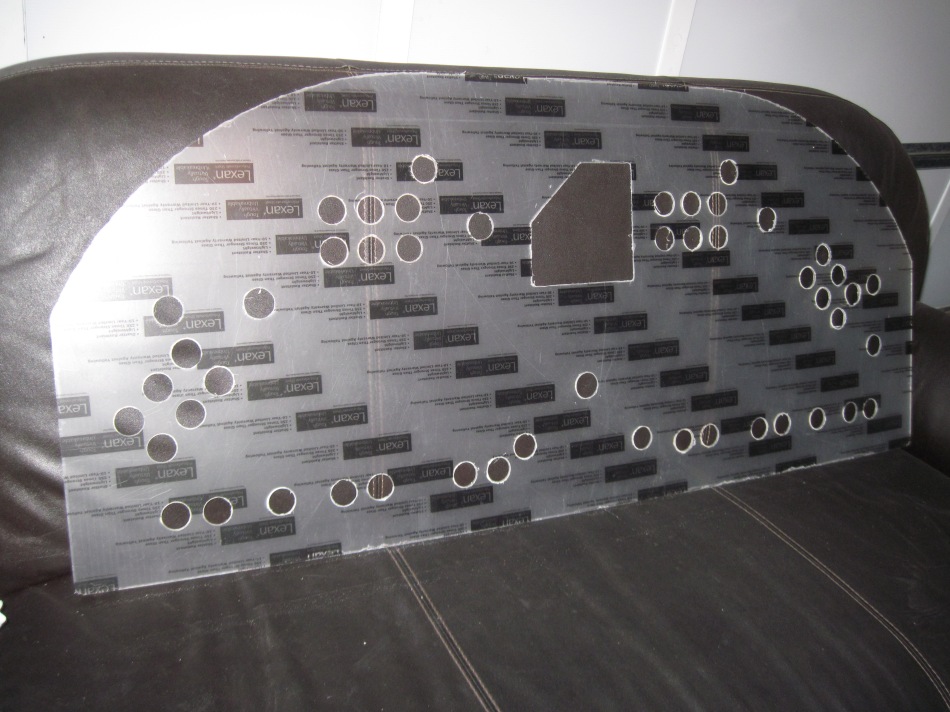
But despite all odds, things went rather smoothly and I was left with a nicely cut, hole matching, piece of art-protecting beauty.

Up next: cup holders and sneeze guard.
I need more holes!

I’m a picky guy building the ultimate arcade machine so naturally I’m not completely satisfied with a pre-drilled control panel. I like most of it, or I wouldn’t have bought it. I just want to make a few minor adjustments.

I want to bring the center – top joystick hole down about 1 1/2 inches. I plan on installing an old-school Tron joystick and so there will need to be some room between the Tron stick and the protective glass in front of the monitor. I don’t want it too close to the trackball hole but I really want it further away from the glass where it will be easier to reach.

IMG_0639Originally the plans called for a 4-way joystick to be installed there for games like Pac-Man and Donkey Kong since an 8-way joystick just won’t work as well. But I am satisfied with my 8-way joysticks and how well they handle 4-way games. What I really want is a Tron stick. Since a Tron stick is much bigger in size it needs more room. Therefore I need to pull it away from the monitor but not so far as to block the trackball.

So I got a hole saw drill bit for my cheap cordless drill, carefully mapped out where I wanted it to go and drilled away.

IMG_0798IMG_0825IMG_0797

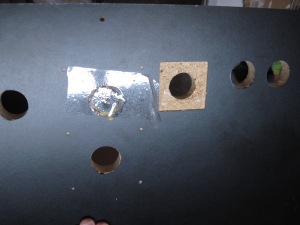
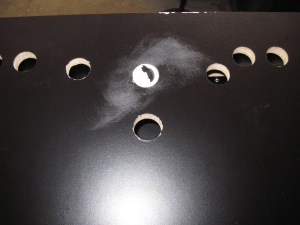
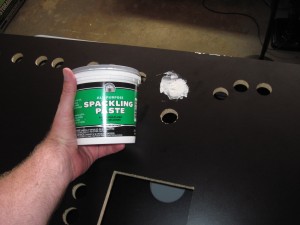
The first picture shows the new hole (towards the bottom of the picture with the 4 small indentations around it). To fill the old 4-way joystick hole, I glued and taped a wooden “plug” I had previously cut into the bottom of the old hole. Then I put in a healthy dose of spackling. And when it all dried, I removed the tape and carefully sanded the top.

I also had to increase the size of the spinner hole (the one with the brown square in the first picture) since the spinner I want fits the same size hole as a push button and not the smaller hole of an older spinner. In order to flawlessly drill a bigger hole over an already existing smaller hole I placed a circular piece of drilled out Lexan (coming up next) into the hole to act as a guide holding my drill with the hole saw bit dead center.

I was very satisfied with the results on both counts. I believed the artwork would cover the texture of the filled hole as if it never existed.

Kaching!

So I was sitting in my dentist’s chair undergoing another semi-annual checkup when he asked me the question all dentists eventually ask: “So Jeff, have you considered adding a coin door to your arcade machine?” It was hard for me to say. I had considered the option and I wanted to add that level of real arcade machine look and functionality but the cost was prohibitive and the payoff minimal since I wasn’t going to be charging anyone to play anyways. The coin door alone on suzohapp.com was going for $150 alone, not including each coin mechanism ($20 x 4) coin box ($10 to $16), and wiring. That’s a lot of money for a super cool but superfluous hardware component. Since its only true purpose in my machine would be a visual aesthetic I was considering something like the $15 door sticker from Groovygamegear until something better came along. But why do dentists ask us such questions while cleaning / drilling our teeth? Its not like I can provide a coherent answer.

Anyways, this was one of those “winging it” issues with my machine. I did not want to spend $200+ on a coin door. So I turned to ebay.

I'm not planning on charging anyone money, but if someone wanted to test the coin door mechanism...

I’m not planning on charging anyone money to play, but if someone wanted to test the coin door mechanism…

Man, sometimes I love ebay. I got this bad boy for around $50 including shipping. A thorough inspection revealed all 4 coin mechanisms worked properly, switches were functional, and a thin layer of dust needed to be cleaned up. I ordered a few small screws from suzohapps just to hold the coin mechanisms in place a little better but all in all I am very pleased with my new coin door. Just can’t wait to get an arcade machine built and plug it in.

Ever wonder what the back of the coin door looks like? No? What's wrong with you?

Ever wonder what the back of the coin door looks like? No? What’s wrong with you?

By the way, I have an awesome dentist.

Shiny Happy Video Game Lights

So I was bouncing around youtube one night and I hit upon several videos of home made arcade machines with light up RGB LED pushbuttons. Ho-Lee-Cow! My mind was blown. I want to go to there. And by going there I mean going to groovygamegear.com.

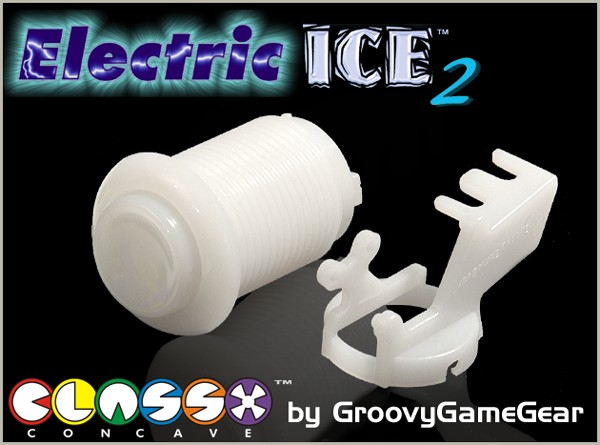
There are several manufacturers of RGB LED push buttons but I went with the Electric Ice 2 from Groovygamegear.com (GGG) because of all the outstanding things I’ve read about them both as a product and GGG as a company and I haven’t been disappointed by either. I’m sure there are many alternatives made by other manufacturers but my machine will be mostly GGG products based on other reviews and recommendations.

In all its plain vanilla unlit-ness.

In all its plain vanilla unlit-ness.

Of the two varieties of LED lit buttons I chose RGB LED’s over the standard color LEDs such as the GGG Nova Gem LEDs for several reasons:

1. Nova Gem LEDs while very bright in well lit areas I found them to be a little distracting for me when I’d like them a little less intense. I would think they probably cast a reflection against the screen while playing a game. Well I’m sure you could turn them off during games but then you lose the point of having them light up in the first place.

Pretty but... not my pretty.

Pretty but… not my pretty.

2. They are never available. It almost looks like GGG stopped making them or they sell out incredibly fast since I’ve never seen any available on their website. I’m sure there’s still a market for them since many people have used them and they still have them listed on their web site but I haven’t contacted Randy (from GGG) and asked him why they are never in stock because plainly, I am not going with them for this machine. YOU could ask him, though. He sounds like a very nice guy, tell him I said “hi”.

3. OK maybe I should have started with this one but here it is at number three:

Nova Gem LED = 1 Color

Electric Ice 2 RGB LED = Thousands! Freaking thousands of colors to play with! Yeah, the unlit button is a dull white color but that’s just the cone waiting for the ice cream!

Maybe in some future arcade machine (not that I am planning at all on making at the moment) I will use single color Nova Gem LEDs but for now I want a party machine! Like this one! But without the crappy music.

By the way, even though I decided to use RGBs I still really love Robert Downey’s work on his Arcade Odyssey. This is a beautiful machine.

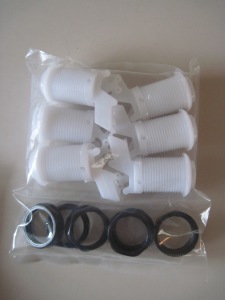
So I order my first batch of 7 Electric Ice 2 buttons along with a 32 port LEDWIZ (a circuit board needed to make your RGB LEDs shine and dance) from GGG.

oh boy oh boy oh boy oh boy!

oh boy oh boy oh boy oh boy!

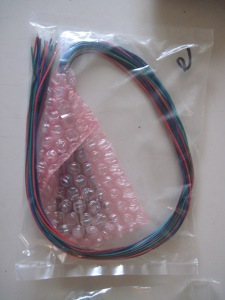
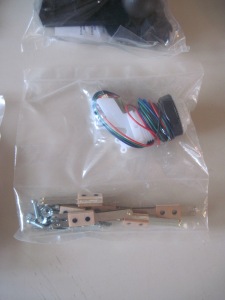
Its not easy to see but inside the pink bag are 6 RGB LEDs all wired up already.

Its not easy to see but inside the pink bag are 6 RGB LEDs all wired up already.

The good people at GGG wired one of the 7 buttons for me just to show me how its done. Aww, how nice.

The good people at GGG wired one of the 7 buttons for me just to show me how its done. Aww, how nice.

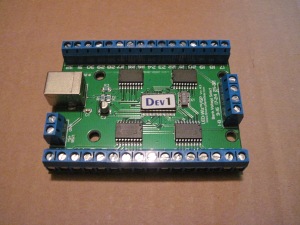
The 32 port LEDWIZ in all its glory.

The 32 port LEDWIZ in all its glory.

Some of the research I’d done online led me to believe wiring up some LEDs wasn’t that difficult. I believed what I read, but I never had any electrical experience wiring things and now I began feeling in a bit over my head. In my past I have been known to “wing it” at times and I’ll admit, some of my plans for this machine are still in the “wing it” stage but I REALLY don’t want to fry anything expensive. So yeah, I’m a little bit intimidated. Time to do some more learn-a-ma-fa-cation.

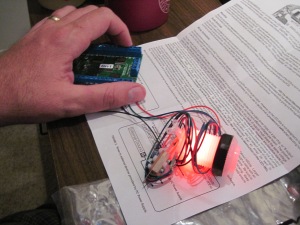
I know this looks a lot that last picture but I'm just THAT proud of myself right now!

I know this looks a lot that last picture but I’m just THAT proud of myself right now!

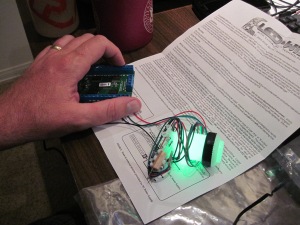
I am the greetest!

I am the greetest!

So I poked around online again, re-read the installation instructions sent with the LEDWIZ, rechecked my work, carefully wired up the one switch the good people at GGG sent me pre-wired and lo and behold… it works! When I first saw this button flicker to life I nearly fell out of my chair. Then I installed the software and changed the lights and created a few simple patterns. I know, to you its not a big thing but inside, I was all like:

Control Freak!!!

Next up, the true start on my road towards building my cab. Behold! My control panel-inator!!!

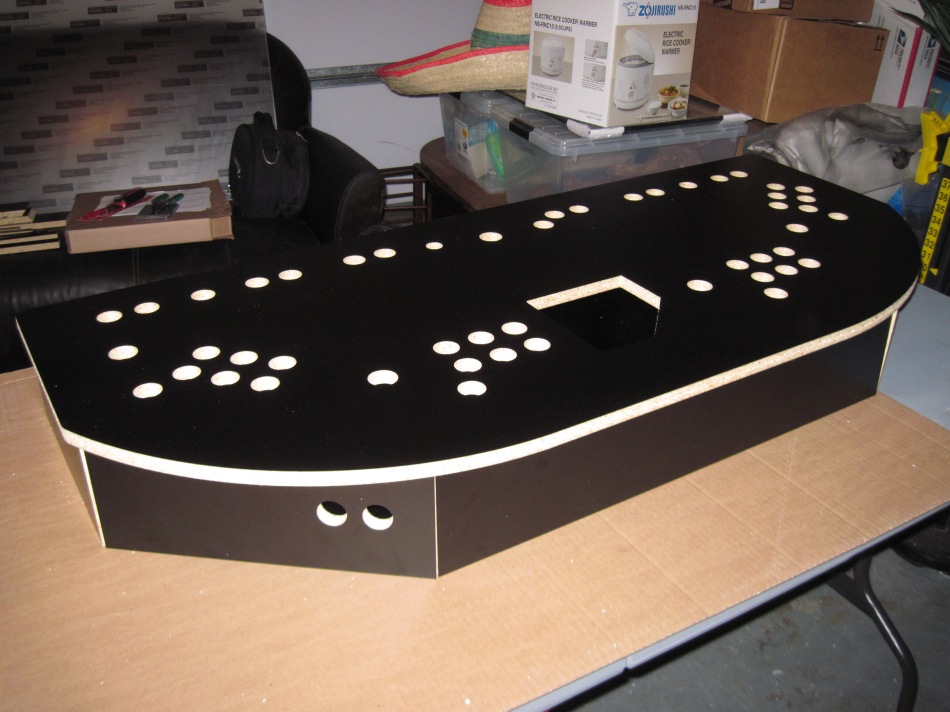
5 joysticks, 48 buttons (including side ones), 1 trackball, 1 spinner. All kinds of crazy arcade goodness.

Roughly 4′ across and almost 2′ wide with space for 5 joysticks + 48 buttons (including side ones) + 1 trackball + 1 spinner = All kinds of crazy arcade goodness.

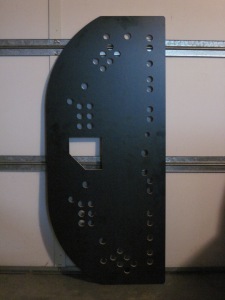
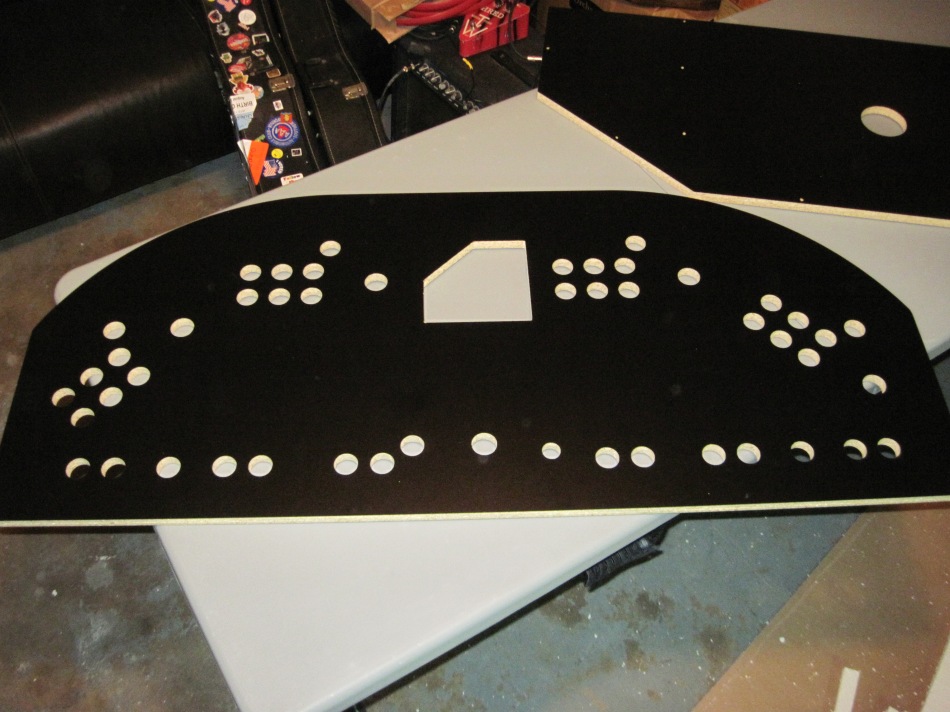
So I order this awesome Quad Control Panel Kit and red T-molding from the good people at North Coast Customs (mameroom.com) and it is beautiful. I was crazy excited to open the big, flat box awaiting me on my porch. I went with the quad instead of the Classic Control Panel (controls for 2 players instead of 4) because I plan on only making one arcade like this so I chose to go all out and make the ultimate party machine with a 4 player set up. The kit is machine crafted to perfection meaning the holes are clean, spaced appropriately, and all were drilled at perfect 90 degree angles. Every part of the kit is covered on both sides by a nice layer of black laminate creating a very professional looking product. The price was $250, T-molding was $7, and since the whole package weighs around 40 lbs shipping came out to around $40 so the total was almost $300. I considered this money well spent.

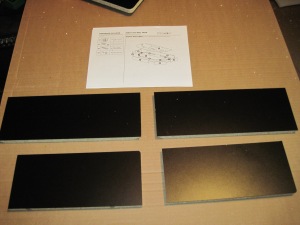
Well, almost. When I ordered this kit from their website, I had requested it include button holes on 2 of the side panels  so I could play some emulated pinball (a common request, North Coast Customs even has a box to check for pinball holes when ordering) and was a little disappointed to get perfectly flat side panels without any button holes. I fired off a polite email the next day and got a response almost immediately with an apology and a promise the correct parts were now in the mail. They arrived a few days later. I am very pleased with North Coast Custom’s customer service and how fast they resolved my complaint. Problem solved.

Not an illusion. These panels contain no holes!

Not an illusion. These panels contain no holes!

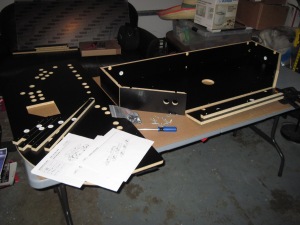
Initial control panel assembly

Initial control panel assembly in progress

Well, almost. Taking a closer look at this panel reveals its pretty cheap plywood. It’s thick and very sturdy but its not the kind of wood I would choose to use for my cabinet because of its inability to hold screws tight. This has been circumvented with the use of liquid nails and some drilling tricks but I’m hoping and praying the screws holding the joysticks never move. That would render the control panel useless. I will cross that bridge when I get there and I will take you with me but for now, I can move on.

Well, almost. As I was looking over the instructions I noticed if I followed them, I would have a very hard time opening my control panel without removing screws. Not very convenient if someone needs to access the wires under the controls. Especially with 5 joysticks, 1 trackball, 1 spinner, and 47 light-up buttons (no middle button on the front panel, I just don’t like it) you bet I’m going to need to get inside there once in a while. Some minor adjustments to the plans adding some hinges are in order.

Well well well. Turns out it wasn’t quite what I expected, but then again I shouldn’t expect North Coast Customs to cater to my exact specs for my own cab. I mean, if they used a nicer quality of wood it would definitely cost more. They are making a solid product for a large community of arcade enthusiasts who don’t want to carve their own control panel. I’m sure many of them will be able to create an amazing control panel that they will never need to open but I will have to modify this kit in a few places. I’m still very pleased with the overall product but I think next time I might try and do it myself. I just need a drill press first, and some laminate, and some… never mind.

Behold! The semi-finished product!

Behold! The semi-finished product!

Where do I begin?

That’s an excellent question. Lets start with finances. I plan to finance my machine fully with money from ebay sales, any outside jobs, and charity. Ebay sales have been working out real well. In fact I bought my first piece for the arcade back in November 2012. So what did I purchase first, you ask?

Next year I will spring for the lazer scope and bayonet attachment.

Peacemaker

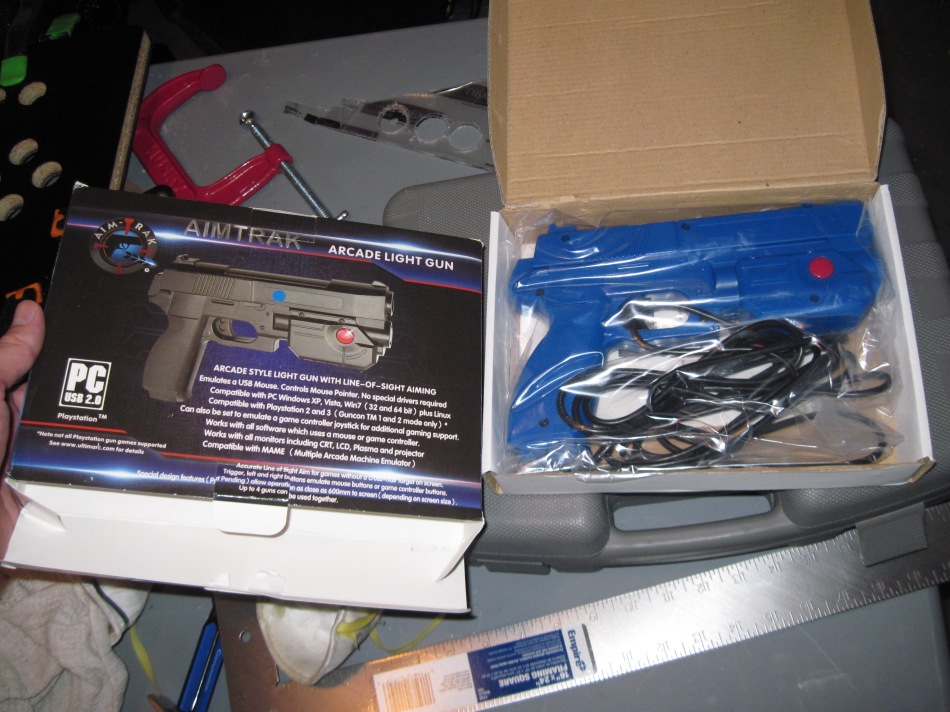
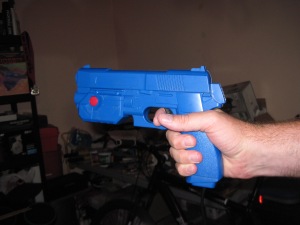
This is an Aimtrak light gun from the Ultimarc company, based out of the UK, and it is beautiful. This box set retails for $95, it may seem a little steep but do some poking around and you will find this is THE gun you want for your arcade. It is a very sturdy gun that came highly recommended by many different satisfied users. I looked into a competitor’s more affordable and wireless option but found far too many complaints to consider it as my trusty sidearm.

The front of the gun has a button on each side easily accessible by the other hand’s thumb and forefinger to use as reload and grenade buttons. This kit also includes a 4″ thin black sensor bar that reports the movement of the gun back to the computer as an extra mouse. The trigger is set to the left mouse button and the other two as left click and middle mouse buttons. Most common set ups don’t even require any driver installation. I did, however, have some difficulty getting the gun to calibrate but by following their simple instructions on their website it was a painless set up.

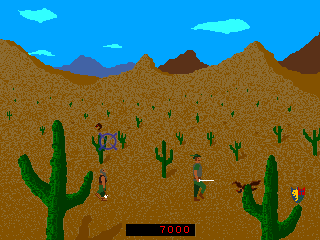
Those pix-elated aliens are gonna pay!

Those pixelated aliens are gonna pay!

This would be so awesome if I could rig a red light to go back and forth Cylon style.

Basically the sensor bar works the same way the receiver on your Wii does. It receives the signal from your device and it tells the PC where the device is. This way, the gun can work on ANY projection device. LED? Check. CRT? Check. 1972 black and white TV with rabbit ears? Check. What about projection screens? Can it be calibrated for a wall? You bet. The sensor bar comes with 2 velcro strips glued to the bottom so it sits firmly on top of the monitor or most any type of display device imaginable. Its only limitation is range which I’m guessing is somewhere around 5 meters, due to the 4 meter USB cable on the gun. Over time, the USB cable on my sensor has been constantly pulling on it so its starting to tilt upwards slightly. This will be fixed when I attach it to the monitor in the cab as I am planning on removing the velcro and mounting it straight to the monitor, making a slight gap in the bezel just to make sure it can still receive a signal.

I've seen slower moving lines at Disneyland, in the SUMMER!

I’ve seen faster moving lines at Disneyland, in the SUMMER!

FIBER!

FIBER!

"You suck, Bakersfield! I'm out of here!"

“You suck, Bakersfield! I’m out of here!”

Kindly think about it, won't you?

Kindly think about it, won’t you?

Let us all put an end to video game violence

This makes me a sad panda.

Game Freaking Over!

Game Freaking Over!

Luckily there are ways of preserving these games so our children may one day be able to mock us for playing such crap.

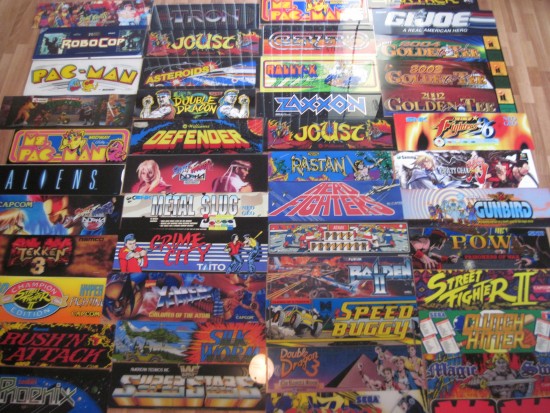
Here’s a sampling of arcade marquees I’ve preserved. Most are up for sale, if you want them. Just let me know.

How many have you played?

How many have you played?

If you fail to plan…

My plan is to make 1 (one) arcade machine to run them all, and it will be awesome.

So I’ve had this idea for a few years now. At least since I’ve been playing games on MAME. Two things have given me the motivation to finally get off my butt and do something about it.

51BWzqwWkyL._BO2,204,203,200_PIsitb-sticker-arrow-click,TopRight,35,-76_AA278_PIkin4,BottomRight,-47,22_AA300_SH20_OU01_

Thanks sis!

1. The book Project Arcade: Build Your Own Arcade Machine by John St. Clair. Like I’ve said before, my sister gave it to me awhile back and it’s full of products, ideas, and how-tos, including full plans for making your very own Ultimate Arcade machine. John does a fantastic job of laying out a wide range of products from the big name arcade parts vendors, showing you every strength and weakness; then he tells the reader which one he chose for his build. I suggest you go get yourself a copy.

Banner2. While checking out the suggestions for a front end I found Hyperspin. Here’s an older but still excellent video showing off what Hyperspin does. Basically a front end is software that helps the user find the games they want to play. While there are many excellent choices (some more suited for a home PC listing game details, history, more artwork, etc.) I went with Hyperspin because it’s flashy and gives me what I would want in my arcade experience. It’s pure eye-candy. You can’t help but be drawn in by its beauty. Hyperspin has tons of themes for different games. The builder sets up the front end with the themes he wants for the games he wants to play. The themes include simple artwork (usually taken from the side of the actual machine or the marquee) and a short video clip demonstrating game play. Once set up, it is very easy to use and as you can see, it is beautiful.

Just look at all these classic arcade characters watching you suck at Pole Position.

Just look at all these classic arcade characters watching you suck at Pole Position.

Hyperspin isn’t without its problems. To set it up can be frustrating. It takes a while to download the themes you want,

When did NASA implement jumping and shooting into its lunar exploration program?

When did NASA implement jumping and shooting into its lunar exploration program?

unless you use their FTP address to get them all at once. The real trick is getting all the emulators to work nicely with Hyperspin. I can understand why it’s difficult to get each of them to mesh with one user interface and play nicely. On the one hand, you have a great front that organizes and manages any number of emulators you want. On the other hand, those emulators aren’t made with integration into Hyperspin in mind, so they don’t always want to work together. Luckily, there’s an extensive forum with a great community of users who are ready and happy to help out. Thankfully MAME is quick and easy to get going.

I'm seriously considering adding audio clips of Billy Mitchel quotes while this theme plays.

I’m seriously considering adding audio clips of Billy Mitchel quotes while this theme plays.

With Hyperspin you can add whatever software you want. I’ve got PC games, movies, and soon I’ll be adding a jukebox player, too. This all takes some poking around forums and learning the ins and outs of Hyperspin but for me it fuels my fire to make the complete entertainment machine.

From here, the ideas came pouring in. Do I want a 2-player set up or a 4-player? 4-player for party games! What games do I want to play? As many of the classics as I can while staying open to playing modern arcade-like games. Trackball? Spinner? Yes and yes! Flashing lights? Ohh yeah! What about classic emulators for the Atari, NES, Genesis, etc? Yes yes yes yes yes! I will install external USB ports for controller plug in. Light gun games? That’s the one thing my wife MADE me include. It has to be able to play Area 51. “OK honey, if I have to.”

What will my overall theme be? I loved GI Joe as a kid and now I have a son who loves GI Joe; plus I found some GI Joe artwork that will look very nice on my machine, so I’m good to go.

Hail Cobra!

It starts…

Cobra logoI have this dream where I go back in time to the 80s. I’m in the arcade at Golf n’ Stuff, and I find my younger self (10 or 11 years old) feverishly shoving quarters into every game that catches his eye. Younger me knew these games were so mindblowingly (it’s now a word) amazing that home consoles (Atari 2600, Colecovision, at the time) were never going to have games that could compete. Arcade games also had these menacing looking black-framed machines with lights and sounds and cool 70s and 80s sci-fi art plastered all over them. This was truly my youthful nirvana. Younger me loved arcades so much that even when we went to Disneyland as a family, younger me would try to slip away and go to the arcade.

So this younger me is now down to his last quarter,  frantically scanning all the arcade marquees looking for which one he should play last before he leaves this oasis of 2-D electric joy for the bland, fully 3-D desert of life. As younger me fights back a tear, not knowing which game to play, not knowing when he will come back again with another pocket of quarters, one thought comes to his mind: “What if I could own my very own arcade machine! How awesome would that be!” A flicker of a smile appears on his face and quickly disappears as rational thoughts push out joyous ones. “How could I ever afford an arcade machine of my own when I’m struggling to come up with a few quarters to put into a game. This will NEVER happen.” Right then, I lean over to my younger self and say: “Someday you will have all these games on your own computer, and it will be amazing.”

At the end of my dream, younger me high-5s older me and then puts his last quarter into skeeball. That punk.

No, wait, that’s not how it ends. Bear with me here. It ends with younger me becoming older me, finding MAME online, tarding way too hard with the classic games of arcades long gone, and then receiving a copy of the book Project Arcade, Build Your Own Arcade Machine. Having read the book several times, scoured the interwebs, done the research and put my time into finding what I want my machine to look and sound like (Cobra from GI Joe theme), younger me, now much much older, is ready to build his very own arcade machine, with almost every game ever created inside. And it will be awesome.

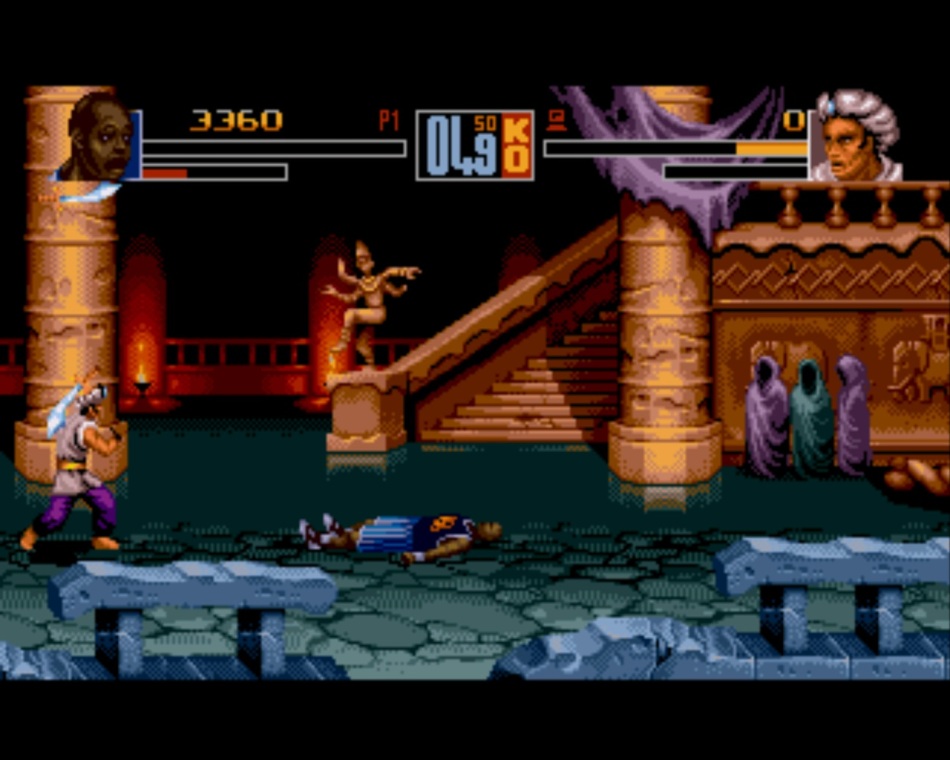
Now I can’t say I’ve never played Shaq Fu.

Yep. I’ve played it. It’s not good. If it helps you sleep better, you could say I’m just not good at it and I have thrown in the towel and run off to play different games that aren’t as sophisticated. But first, hear me out.

Ladies and gentlemen, I give you, the Sega Genesis masterpiece: Shaq Fu!

I once saw a Bruce Lee movie where Kareem Abdul Jabar was facing off against Bruce with a basketball... This game is somehow more silly.

I once saw a Bruce Lee movie where Kareem Abdul Jabar was facing off against Bruce Lee with a basketball… This game is somehow more silly. 

I don't want to see any racial stereotyping going on here! You hear me akhmed?
“I don’t want any racial stereotyping going on! You hearing me, Aladdin?”

A middle eastern guy with a scimitar? Really? I never would have seen that coming. I mean, I expect that behavior from Activision but EA? Come on!

A middle eastern guy with a scimitar? Really? I never would have seen that coming. I mean, I expect that behavior from Activision but EA? Come on!

So after some frantic button mashing looking for my best offensive weapon I found my kick has a good reach. So that's what I'm going with.

So after some frantic button mashing looking for my best offensive weapon I found my kick has a good reach. So that’s what I went with.

"Hang on! I wasn't ready yet! My foot didn't kick! You're cheating!"

“Hang on! I wasn’t ready yet! My foot didn’t kick! You’re cheating!”

So it appears as though my opponent saw through my crazy martial arts style and has mastered the technique of the diagonal jump. I'm doomed.

So it appears as though my opponent saw through my crazy, made-up, martial arts style and has mastered the technique of the diagonal jump. I’m doomed.

I accept my fate like the warrior I am. I quit.

I accept my fate like the warrior I am. I didn’t lose, I quit!

Oh harsh mockery! Your bitter sting bites deep into my recent scimitar wound! "But wait, what you don't understand is that I DO play a sport and, well, its not that I'm really good at it so much as I just have really long legs that move me closer to my goal. I'm not trying to be defensive here I'm just giving clarity to your open ended statement."

Oh cruel mockery! Your bitter sting bites deep into my recently made scimitar wound!
“But wait, what you don’t understand is that I DO play a sport and, well, it’s not that I’m really good at it so much as I just have really long legs that move me closer to my goal. I’m not trying to be defensive here I’m just giving clarity to your open-ended statement.”